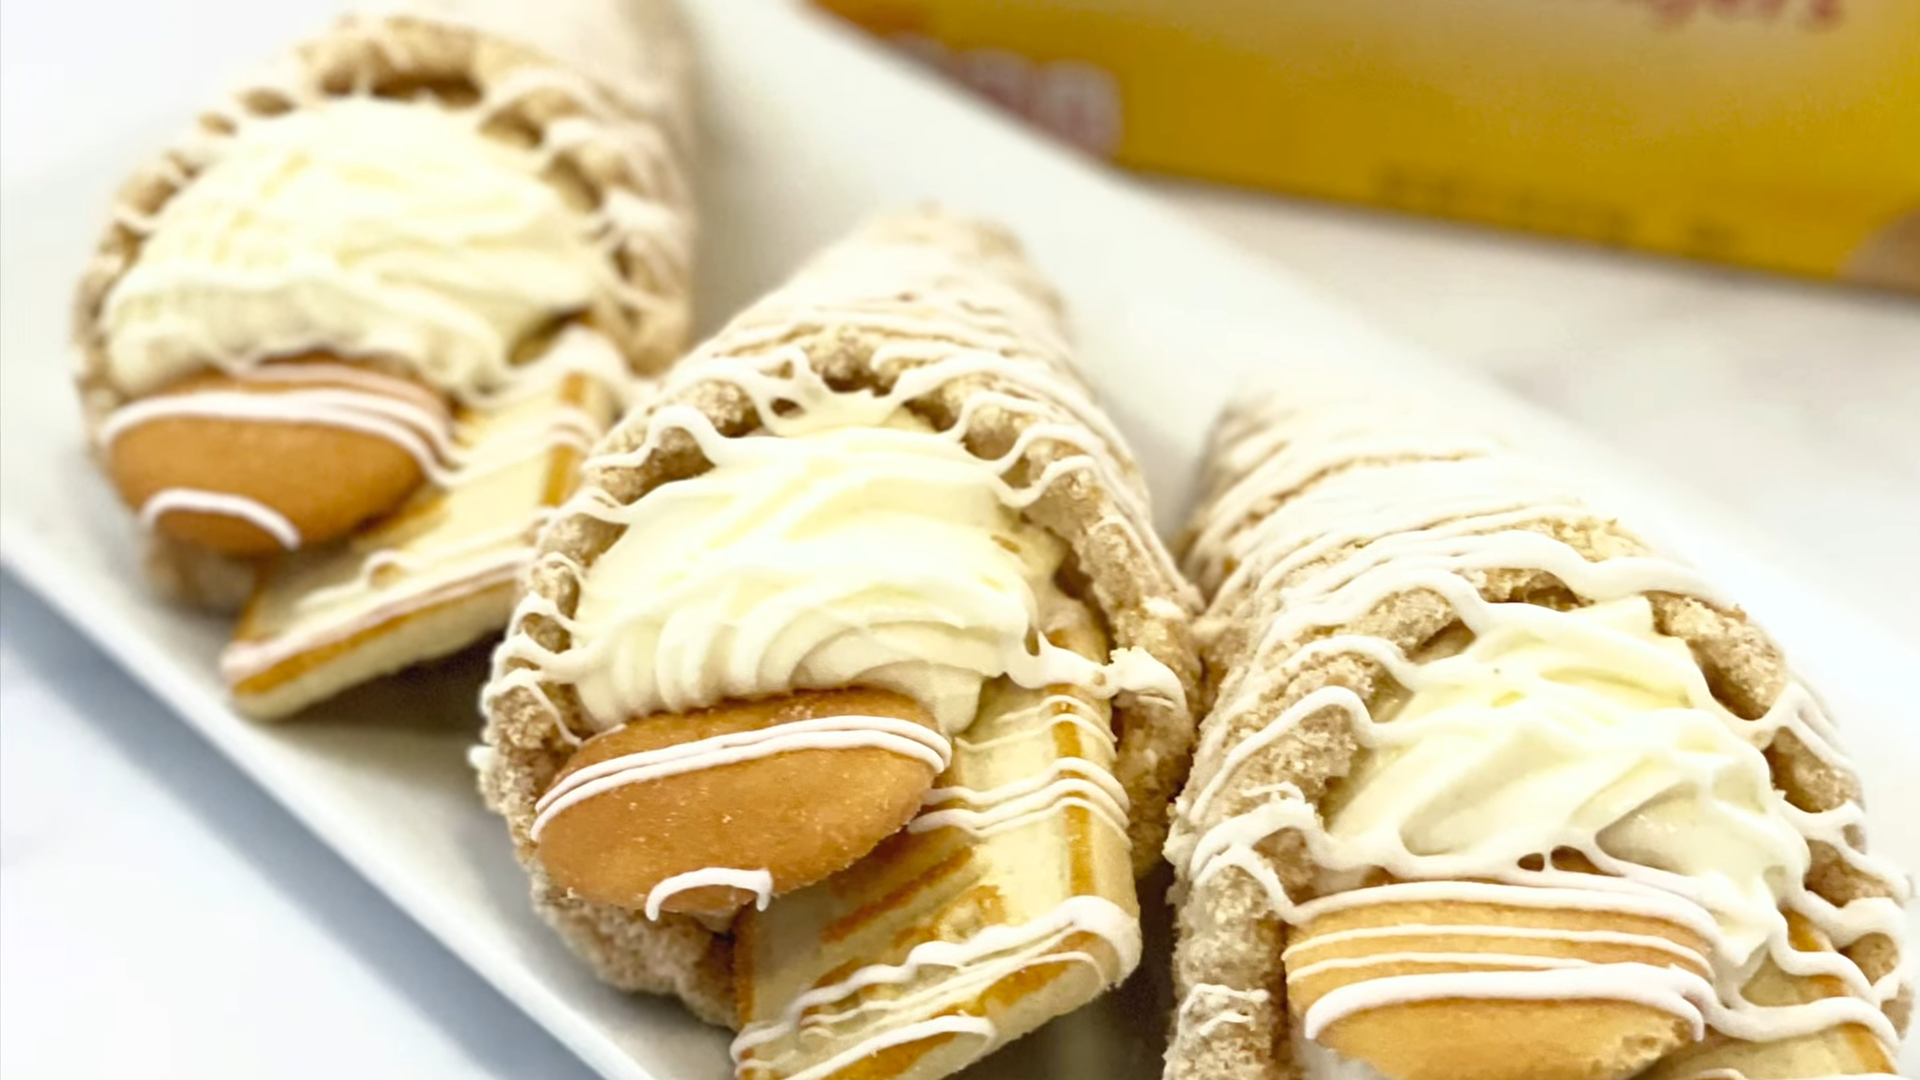
Banana Pudding Cheesecake Cones are a mouthwatering treat that combines the rich, creamy texture of cheesecake with the nostalgic flavors of banana pudding, all encased in a crispy waffle cone. This dessert is perfect for parties, potlucks, or any time you’re craving something sweet and unique. In this article, we’ll walk you through the steps to create this delectable dessert, provide tips for perfection, and even explore some creative variations.
Ingredients Overview
To make the perfect Banana Pudding Cheesecake Cones, you’ll need the following ingredients:
- 1 package (8 oz) cream cheese, softened
- 1 cup sugar
- 1 teaspoon vanilla extract
- 1 package (3.4 oz) banana pudding mix
- 1 ½ cups cold milk
- 1 ½ cups whipped topping or homemade whipped cream
- 6 waffle cones
- 3 bananas, sliced
- 1 cup crushed Nilla wafers or graham crackers
For those who enjoy banana-based treats, you might also like to explore these Banana Bread Cinnamon Rolls, which are just as delightful and easy to make.
Optional Ingredients:
- Chocolate chips
- Caramel sauce
- Strawberries
- Peanut butter chips
Step-by-Step Recipe Guide
Creating these Banana Pudding Cheesecake Cones is easier than you might think. Follow these steps to ensure success:
1. Preparation of the Cheesecake Mixture
- In a large mixing bowl, beat the cream cheese and sugar until smooth and creamy.
- Add the vanilla extract and mix until well combined.
- In a separate bowl, whisk together the banana pudding mix and milk until it starts to thicken.
- Gradually fold the pudding mixture into the cream cheese mixture.
- Finally, fold in the whipped topping until the mixture is light and fluffy.
2. Assembling the Cones
- Prepare the waffle cones by placing a few banana slices at the bottom of each cone.
- Spoon or pipe the cheesecake mixture into the cones, filling them halfway.
- Add a layer of crushed Nilla wafers or graham crackers.
- Continue filling the cones with the remaining cheesecake mixture, leaving a little space at the top for garnishing.
3. Decorating the Cones
- Top each cone with a dollop of whipped cream.
- Add more banana slices and a sprinkle of crushed wafers.
- For an extra touch, drizzle with caramel sauce or add some chocolate chips.
Tips for Perfect Banana Pudding Cheesecake Cones
To ensure your Banana Pudding Cheesecake Cones turn out perfectly:
- Avoid soggy cones: Serve immediately after assembling, or store the cheesecake mixture separately and fill the cones just before serving.
- Storage tips: Keep the cheesecake mixture refrigerated until ready to use. Store leftover cones in an airtight container in the refrigerator for up to 24 hours.
- Customization: Feel free to experiment with different toppings or mix-ins, like strawberries or peanut butter chips, to create your own unique version.
For those interested in making their own cones, here’s a great resource on how to make homemade waffle cones from scratch.
Health Considerations
While Banana Pudding Cheesecake Cones are undeniably delicious, they are also rich in calories and sugar. Here’s a breakdown of the nutritional content:
- Cream cheese is high in fat and calories, but it also provides protein and essential vitamins. Learn more about the nutritional benefits of cream cheese.
- For a healthier version, consider using low-fat cream cheese and a sugar substitute in the cheesecake mixture.
- Portion control is key—these cones are quite indulgent, so serving smaller portions can help manage calorie intake.
Creative Variations
If you want to switch things up, try these variations:
- Strawberry Banana Pudding Cheesecake Cones: Substitute half of the banana slices with fresh strawberries.
- Chocolate Banana Cheesecake Cones: Mix in chocolate chips with the cheesecake mixture, or drizzle melted chocolate over the top.
- Peanut Butter Banana Cones: Add peanut butter chips to the cheesecake mixture or drizzle peanut butter sauce on top.
For more creative dessert ideas, check out the recipe for Fried Cinnamon Apple Rings, which offers a delightful twist on classic apple desserts.
Serving Ideas and Occasions
Banana Pudding Cheesecake Cones are a versatile dessert, perfect for:
- Parties and Potlucks: Their portable nature makes them easy to serve and enjoy.
- Picnics and BBQs: Keep them chilled in a cooler until ready to serve.
- Holidays: Add a festive touch with seasonal toppings like crushed peppermint or colored sprinkles.
FAQs
How do I prevent the cones from getting soggy?
To prevent soggy cones, fill them just before serving. If you’re preparing them ahead of time, store the cheesecake mixture separately and assemble the cones when ready to eat.
Can I make the cones ahead of time?
Yes, you can prepare the cheesecake mixture in advance and store it in the refrigerator for up to 24 hours. Assemble the cones just before serving to ensure freshness.
What are some good substitutes for Nilla wafers?
Graham crackers or shortbread cookies make excellent substitutes for Nilla wafers in this recipe.
Can I use a different type of pudding mix?
Certainly! Vanilla, chocolate, or even strawberry pudding mix can be used to create different flavors of cheesecake cones.
How can I make this dessert vegan or dairy-free?
Use dairy-free cream cheese, plant-based milk, and vegan whipped topping. Opt for a dairy-free pudding mix and check that the cones are vegan-friendly.
Conclusion
Banana Pudding Cheesecake Cones are a delightful and indulgent dessert that’s sure to impress your family and friends. With the perfect combination of creamy cheesecake, sweet bananas, and crunchy waffle cones, this treat is as fun to make as it is to eat. Whether you’re looking to try a new dessert recipe or want to wow your guests at your next gathering, these cones are a must-try. Get creative with the variations and enjoy every bite!


2 thoughts on “Banana Pudding Cheesecake Cones: The Ultimate Dessert Delight”